Pin Generation
Purpose
The main purpose of this module is to enable the administrator to view and manage the list of PIN Generations performed on the system. The PINs will be generated for security purposes, while adding a credit limit, donations, coupons, etc., the user needs to specify the respective PIN. This module access is available user-specific. If the user has access then only it will display.
Navigation
Path: Pin Mgmt. > Pin Generation
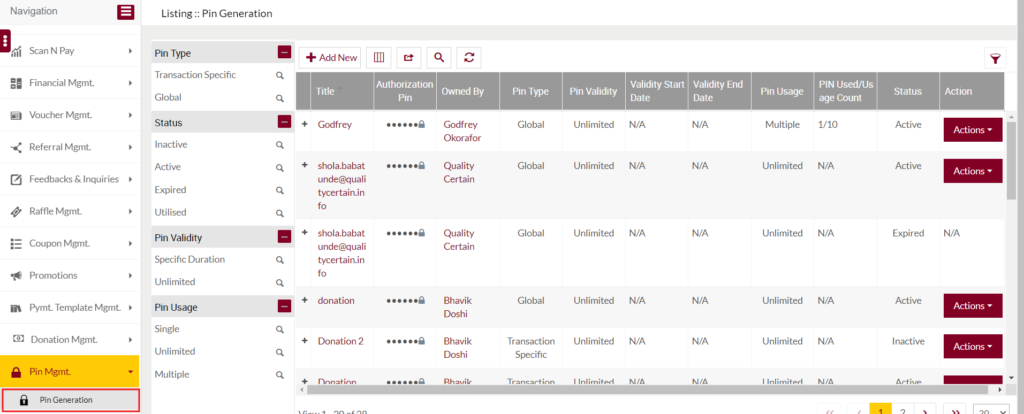
Listing Screen
Under the PIN Generation module users will be able to add and view the list of PIN Generations performed on the system. Admin will be able to search the generated pins using the filter option that is provided on the list. The Pin Generation listing contains the following
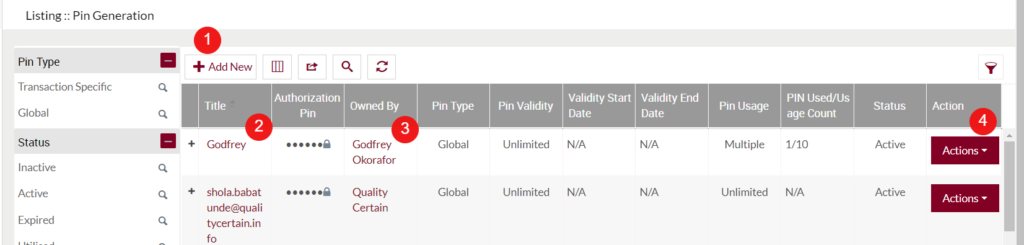
Pin Management: To generate a new one, click on the below button.

Add Pin
- Users will be able to add the Pin from this page
- The user needs to fill in the below information to add a pin to the system.
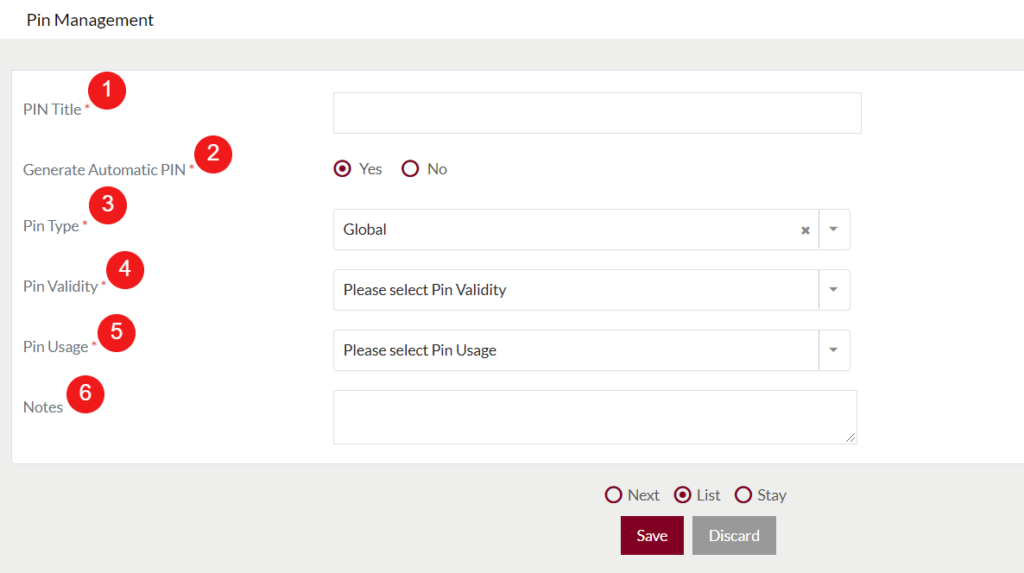
- PIN Title (Required) – Specify the tile for the PIN generation.
- Generate Automatic PIN (Required) – The user will be able to select the option for generating the pin. If selected “Yes” a 6 digits Pin will be generated automatically. By default “Yes” will be selected. If selected “No”, below filed will be displayed
- Authorization Pin (Required) – The user will be able to set any 6 digits Pin for authentication. On clicking the available “Lock” icon user will be able to view the entered pin.
- Pin Type (Required) – The user will be able to select the type of the Pin. If selected “Global” the specific pin will be applicable for all the areas where the pin authentication has been provided on the system. If selected “Transaction Specific”, the below field will be displayed
- Transactions (Required) – The user will be able to select single or multiple sections where he/she wants to provide the PIN authentication. The dropdown contains the areas of the sections where the PIN authentication will be possible. (This configuration will be provided on the system by the Admin)
- Pin Validity (Required) – The user will be able to select the limit for the pin validity. If selected “Unlimited” there will be no expiry limit for using the pin. If selected “Specific Duration” user will be able to specify the duration in the below fields
- Validity Start Date (Required) – Specify the validity start date for the pin.
- Validity End Date (Required) – Specify the validity end date for the pin.
- PIN Usage (Required) – The user will be able to select the limit for the pin usage. If selected “Single” the pin will be used only once. If selected “Unlimited” the user can use the pin unlimitedly. If select “Multiple”, the fields will be displayed
- Usage Count (Required) – Specify the limit for the PIN usage. If the user specifies the count as “5”, then the PIN will be used for 5 Times on the system, after that the PIN usage will be exceeded and the user will not be able to use this PIN again.
- Notes – The user will be able to add any note for the PIN generation if required.

- Admin can save the pin by submitting the form or can discard the Pin.
- On Submission, the pin will be listed on the Pin Management listing page.
2. Title: In the listing, on clicking on the “+” icon beside the title name, the user will be able to view the PIN transaction details, and on clicking the Title name of the generated PIN, the user will be navigated to the Summary of the PIN Management page. In the summary section, the user will be able to view all the PIN usage Transactions details and their activities.
3. Owned By: In the listing on clicking on the user name available under the Owned by field, the admin will navigate to the particular user summary page.
4. Actions: On clicking on the Actions button available under the Action field, users will be able to view the following options. (Note: Action button will be visible only for the PIN generations having status “Active” and “Inactive”.)
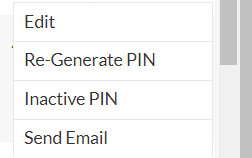
- Edit – On clicking the “Edit” button, the user will be able to update the particular PIN Generation.
- Re-Generate PIN – On clicking the “Re-Generate PIN” button, the user will be able to re-generate a new pin for the particular pin generation.
- Once the PIN gets regenerated, a new record will be created automatically with the newly generated PIn, and the old PIN status will be shown as expired, users will not be able to use the old pin again.
- Inactive PIN – On clicking the “Inactive PIN” button, users will be able to Inactivate it.
- For the Inactivated PINs, the “Reactivate PIN” button will be displayed, on click, the user will be able to reactivate it again.
- Send Email – On clicking the “Send Email” button the user will be able to send the PIN details with other users existing on the eShop system.