My Companies
Purpose
The main purpose of this module is to enable the administrator to view and manage the sub-companies under the particular corporate company. If a sub-company is added the sub-company will have the access to all the products and the retail stations of the parent corporate company.
Navigation Path
Path: Corporate Mgmt. > My Companies
Listing Screen
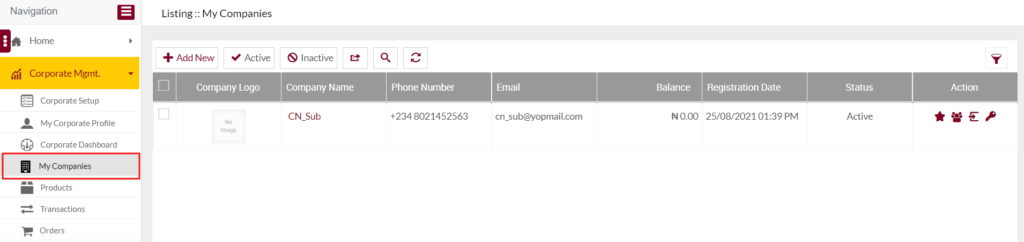
View list of the sub-companies under the particular corporate company that is added by the corporate admin previously. Admin will be able to search the data using the filter option provided on the list.
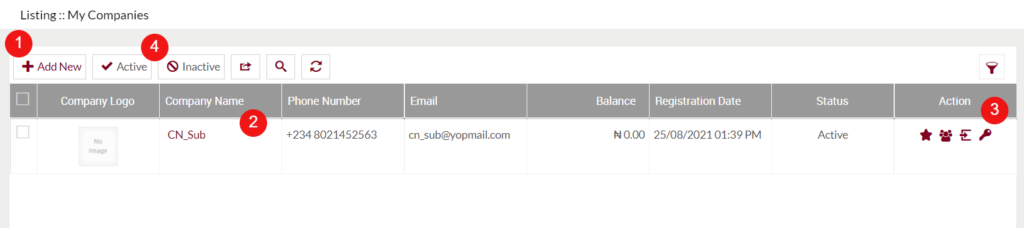
Add Corporate Sub-Company: To add a sub-company under the particular corporate company, click on the below button

Add/Edit Company
- Users will be able to Add/Update the company from this page
- The user needs to fill in the below information to add/edit the corporate company.
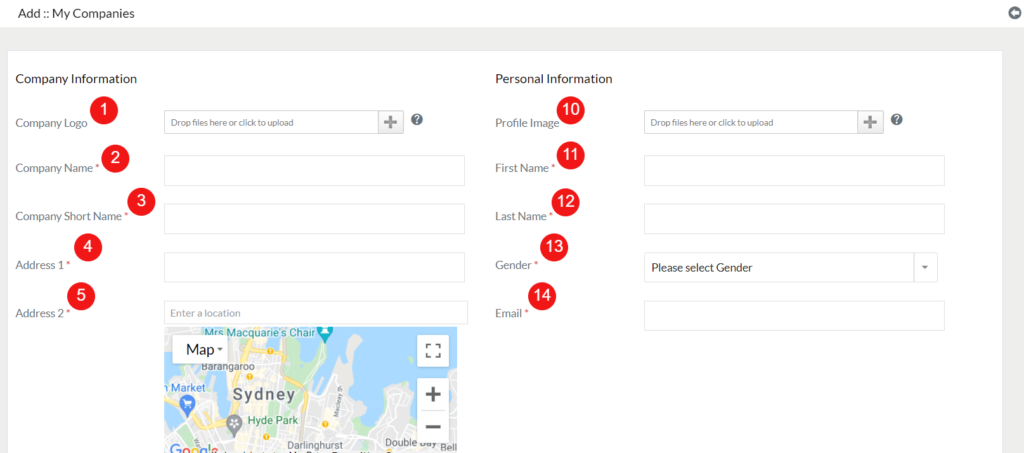
Corporate Information: Information regarding the corporate company
- Company Logo: Specify a logo for the corporate company display.
- Company Name (Required): Enter the Company display name.
- Company Short Name (Required): Specify a short name for the company.
- Address 1 (Required): Enter the company address.
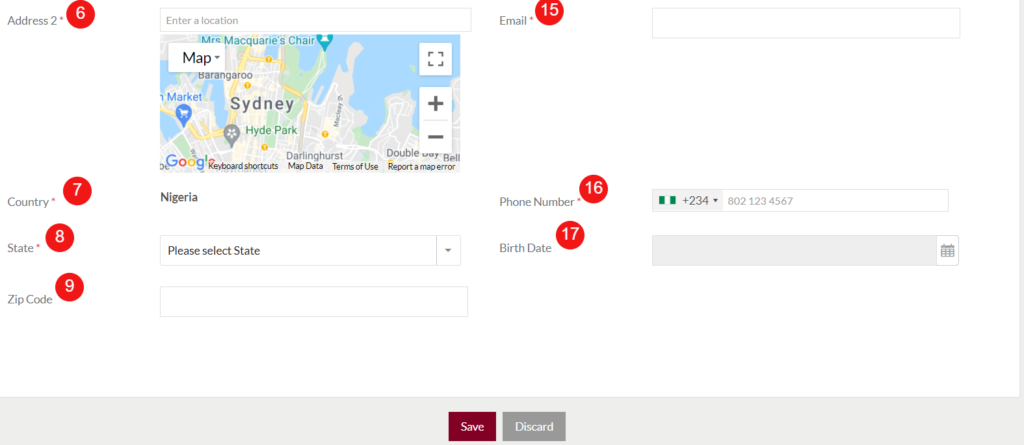
- Address 2 (Required): Enter the second address for the company, the map will point out the location of the provided company address.
- Country: Country will be Nigeria by default, the user can’t change the
- State: Choose the state of the company, based on the selected county the states of that particular county will be displayed in the dropdown.
- Zip Code: Enter the zip code.
- Profile Image: Upload the profile image of the company contact person.
- First Name (Required): Enter the contact person’s first name.
- Last Name (Required): Enter the second name of the person.
- Gender (Required): Choose the person’s gender.
- Email (Required): Specify the valid email id of the contact person.
- Phone Number (Required): Select the ISD Code from the dropdown list and enter the phone number.
- Birth Date: Select the date of birth from the calendar.
- Status (Required): Set the status of the company contact person.
2. Company Name: Represents the display name of the corporate company. On click, the admin will be navigated to the Corporate Company Update page.
3. Action: From here admin will be able to view the details of Grade allowance and corporate employees of the particular corporate company. Admin will also be able to change the password and log in as the corporate customer by clicking on the respective buttons in the action field.

4. Active/Inactive: By selecting the required row and by clicking on the active/inactive button user will be able to activate or inactivate the particular company.